Frequently Asked Questions from Workday Integrated Users
This article contains frequently asked questions regarding the Workday integration
Frequently Asked Questions
If I need to add a new role to the platform, what information do I need to provide to ensure the integration is all set to go?
First, you will need to collect the Workday Req ID of this newly created role. To find this, you can do the following:
-
Navigate to Workday and click into your new role
-
Copy and save the Req ID which is typically in the format: R-####

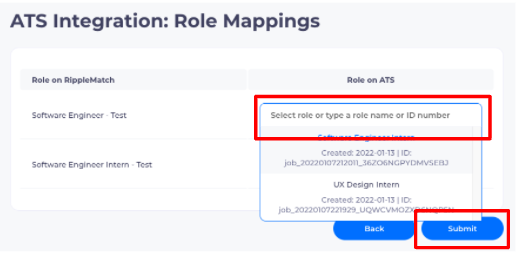
Then, you'll want to log into RippleMatch and navigate to the Integrations Portal. From there, click Edit next to the Workday icon. Then continue clicking Save and Continue until you get to the Role Mappings screen.
Once you're on this screen, you will be able to map your newly created RippleMatch role on the left by searching for the Workday Req ID on the right!

Does the integration support Candidate Home Accounts?
No, we are not able to create the Candidate Home Accounts on behalf of candidates.
Is there a delay in when candidates are advanced from RippleMatch to when they show up in Workday?
Candidates should show up in Workday within 5 minutes of being advanced.
Are duplicate candidates uploaded into Workday?
Yes. RippleMatch does not have the ability to scan existing candidates in Workday before uploading a RippleMatch candidate. However, Workday has a Duplicate Management Framework which provides a customizable set of rules to manage duplicate candidate records.
Are we able to send any other candidate information outside of the ones mentioned above (i.e. education, work history, etc.)?
At this time, we are only able to push the candidate data outlined in this section of this document.
Can we get a candidate’s responses to the supplemental questions set up within the requisitions in Workday?
Yes, RippleMatch can support one questionnaire across all roles posted to RippleMatch using our Custom Question Mapping feature.
How do I map my Workday sources to my RippleMatch sources?
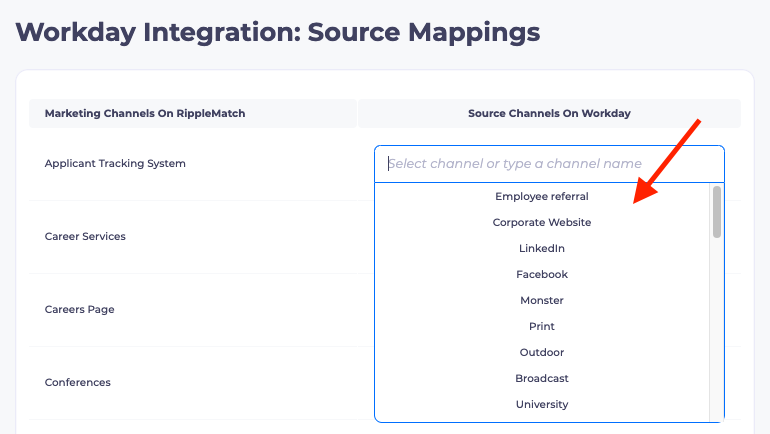
In order to map your sources, you need to log into RippleMatch and navigate to the Integrations Portal. From there, click Edit next to the Workday icon. Then continue clicking Save and Continue until you get to the Source Mappings screen.
Once you're on this screen, you will be able to map your RippleMatch sources on the left by selecting the appropriate Workday sources on the right!

How can I get additional information on the Workday <> RippleMatch integration?
For questions related to setting up your Workday integration, please reference this Set Up Guide. For questions related to using your Workday integration, please reference this article.
For all other questions, please email support@ripplematch.com, reach out to your Customer Success Manager, or reach out to your Solutions Architect.
![1-RM.png]](https://resources.ripplematch.com/hs-fs/hubfs/1-RM.png?height=50&name=1-RM.png)