Setting Up Your Lever Integration
How do I integrate my roles on RippleMatch with my jobs in Lever?
In order to set up your Lever integration, you will need to do two things:
The steps below will walk you through the process necessary to successfully complete your Lever integration.
Step 1: Gathering Your Job IDs
While you're in Lever, click on Jobs > View Job Site > External Job Site.

Select one of your active roles. Copy and save the Job ID found in the URL. The Job ID will look like a long series of letters and numbers that immediately follow '/Company/XXX'. Please ensure that the entire Job ID is captured. Repeat Step 1 for each of your active roles. Save all of the Job IDs for a future step.

Step 2: Configuring the Integration
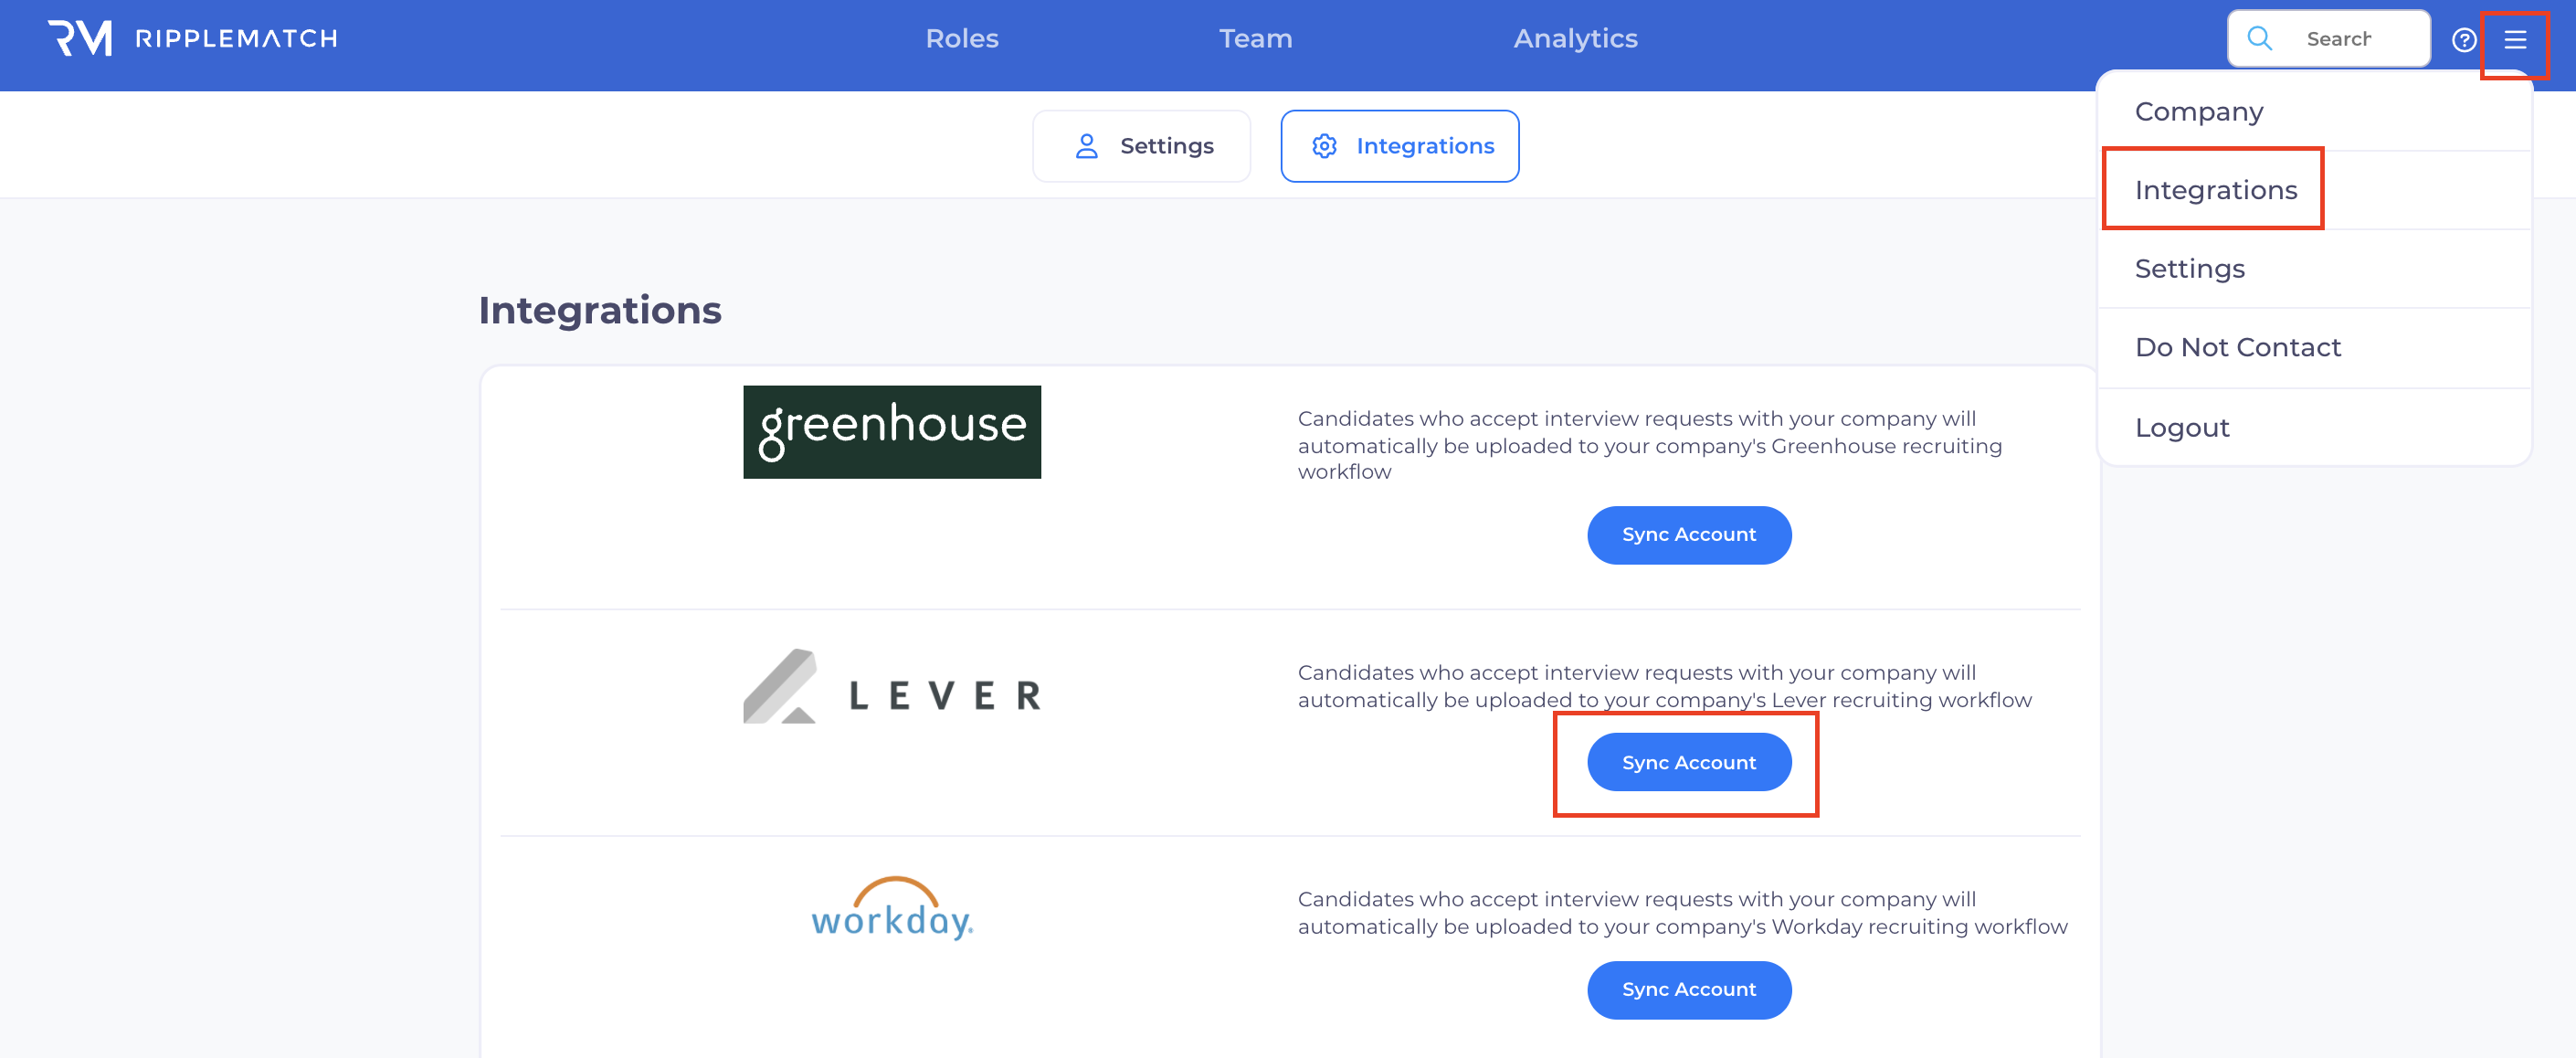
Log in to RippleMatch. Click the menu on the top right-hand corner. Click Integrations. Click Sync Account next to the Lever logo.

After clicking Sync Account, you will be re-directed to the authorization workflow where you will be promoted to grant access to connect RippleMatch and Lever.
Then click Grant Access.

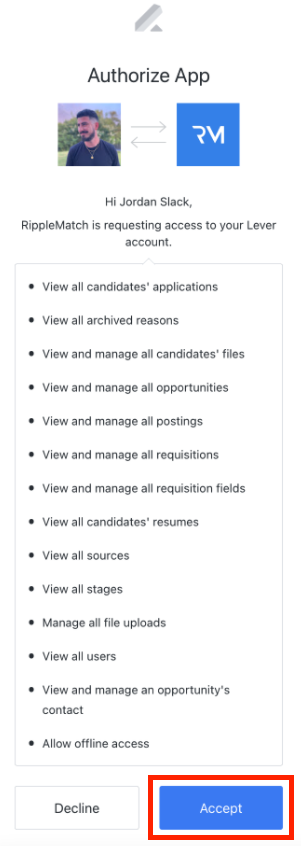
Once you click Grant Access, you will be re-directed to provide approval for the connection and you will be presented with a list of permissions that you are agreeing to provide access for.
Click Accept.

Then you will be prompted to select a user from the drop down menu. Click Save and Continue.
Note: You will want to select a user that has access to all of your UR roles. If users' names are not populating, you can search by email.

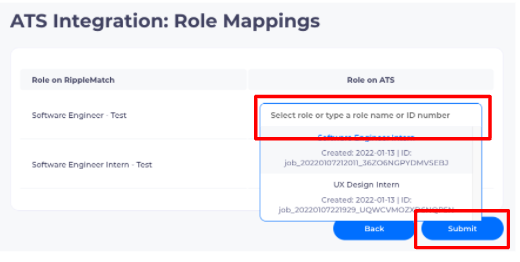
Lastly, map your roles on RippleMatch to your roles in Lever using the Job IDs found in Step 1. Then click Submit.

Once you've completed these steps, your Lever Integration is all set and you now have a fully functional integration. As always, please reach out to our team if you need any assistance.
![1-RM.png]](https://resources.ripplematch.com/hs-fs/hubfs/1-RM.png?height=50&name=1-RM.png)