Setting Up Your CodeSignal Integration
This article walks through the steps to configure the CodeSignal <> RippleMatch Integration.
In order to set up your CodeSignal integration, you will need to do four things:
Step 1: Generate an API Key
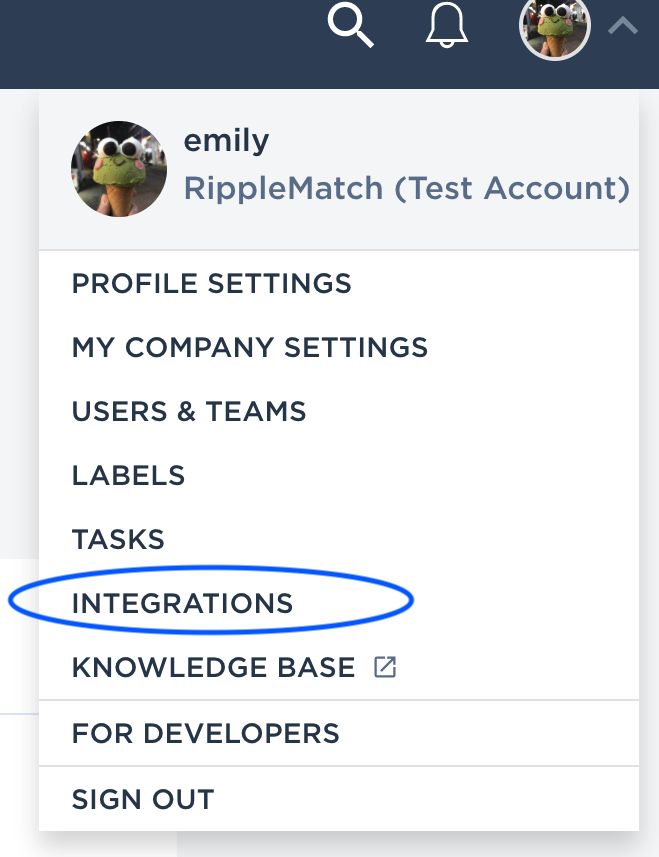
Log in to CodeSignal and navigate to the Client Dashboard. Then, select your user icon in the top-right corner and click on Integrations.

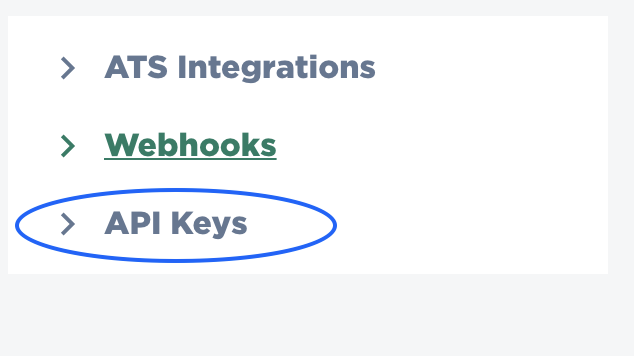
Select API Keys from the menu on the left-hand side.

Then, click Add a Key and add 'RippleMatch Integration' in the description field.

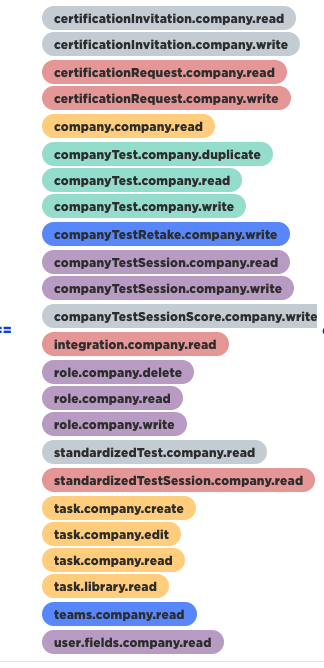
Next, add all permissions to your key and click Save to see the following screen:

Then, copy the new API Key to share with your RippleMatch team.
Step 2: Generate a Webhook
Navigate to the Integrations section again. Then, click Add a Webhook.

Next, select the following Event Types:
- preScreenResultShared
- preScreenResultVerified
- preScreenResultVerificationPending
- preScreenResultNotVerified
- preScreenExpired
- preScreenCandidateDeclined
Then, add the following endpoint:
-
https://app.ripplematch.com/api/v2/integrations/cs/webhooks/prescreen
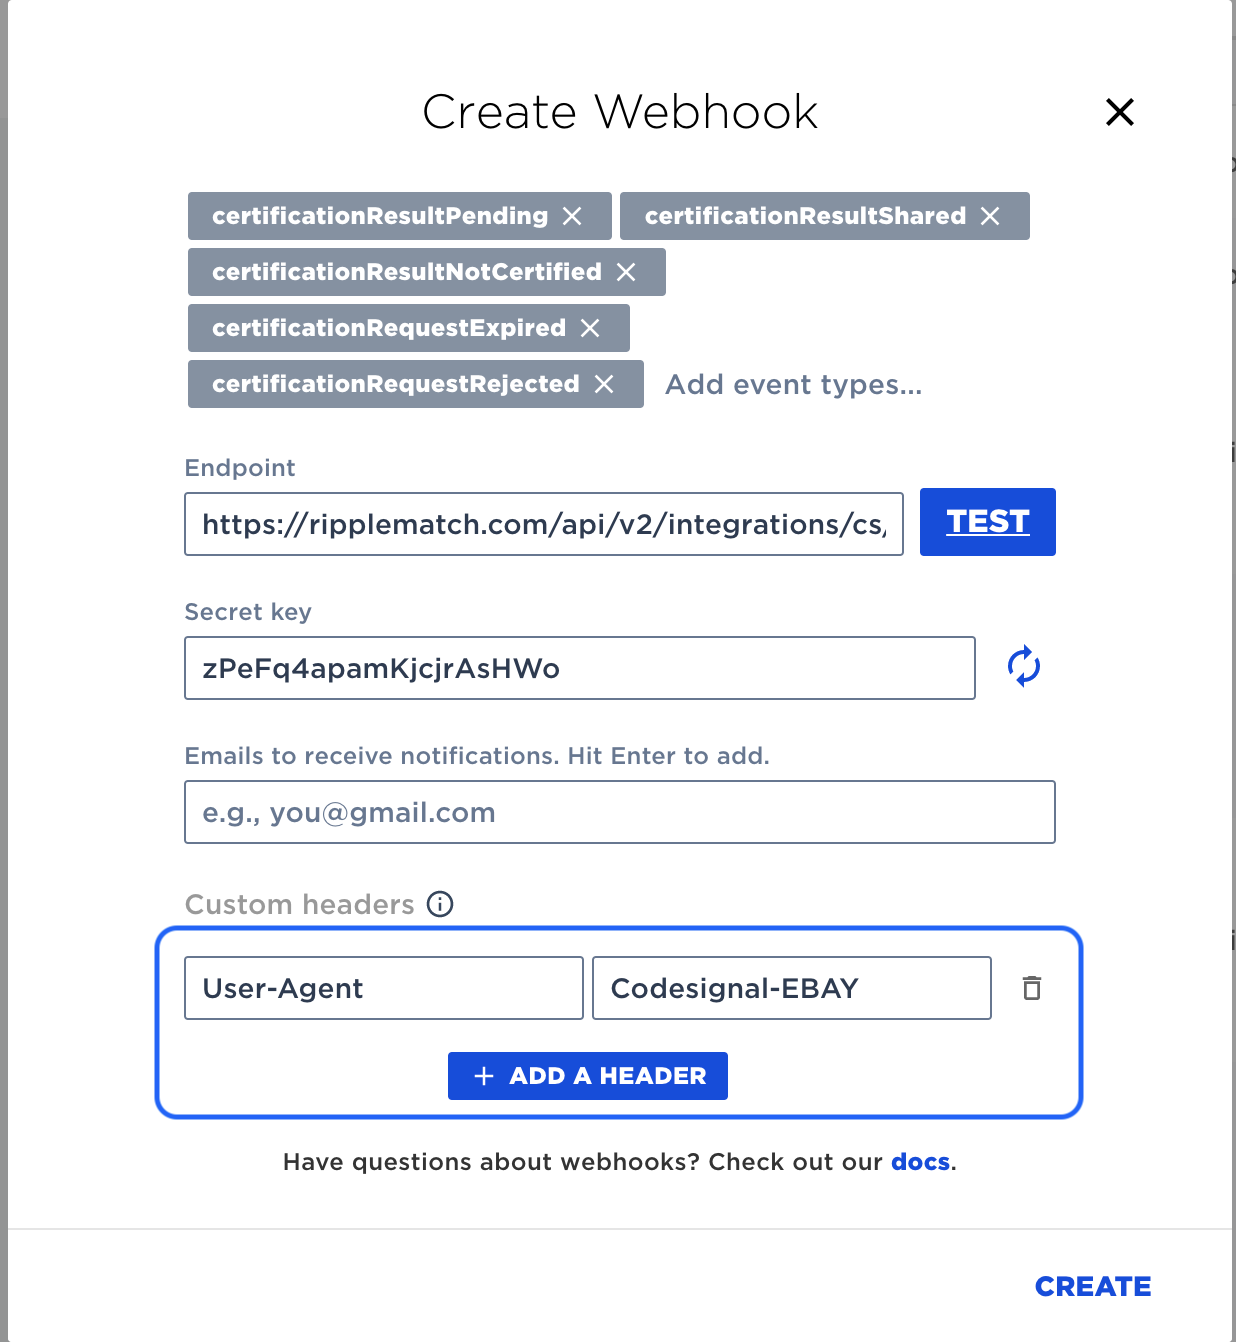
Next, select the option to Add a Header and fill in the fields as follows:
-
Field #1: User-Agent
-
Field #2: Codesignal-<company_name>

Then, click the Test button next to the Endpoint field.
If the test is successful, you will see the following message:

Next, click Create.
Step 3: Gather the RippleMatch Role Public-IDs
After generating the API Key and Webhook, head to the role(s) in RippleMatch that you'd like to automate the CodeSignal assessment for, and copy and paste the Public-ID from the address bar.

Step 4: Gather the CodeSignal Test IDs
The very last step is to gather your CodeSignal Test IDs to share with your RippleMatch Team. This can be found in the URL within CodeSignal. The part following tests/ is the Test ID.

If you have multiple CodeSignal assessments for different roles on RippleMatch, please make sure to note which CodeSignal Assessment IDs should be used for the RippleMatch Role Public-IDs you provided.
Once the API Key, Webhooks, PublicIDs, and Assessment IDs are provided to your RippleMatch team, we will set up a test role with those credentials and a test candidate to test and ensure a successful integration.
![1-RM.png]](https://resources.ripplematch.com/hs-fs/hubfs/1-RM.png?height=50&name=1-RM.png)