How To Track Which Sources Event RSVPs Come From
When you market your event opportunities across different platforms (e.g. LinkedIn, email campaigns, schools' career services), you can use a different RSVP link for each source, these are Tracking Links. This will enable you to track which sources your RSVPs come from without the candidates needing to self-disclose how they found out about the event.
To create a tracking link for an event, navigate to the event management page and select the event for which you will be creating a tracking link. On the event page, click the "RSVP Tracking Links" button.

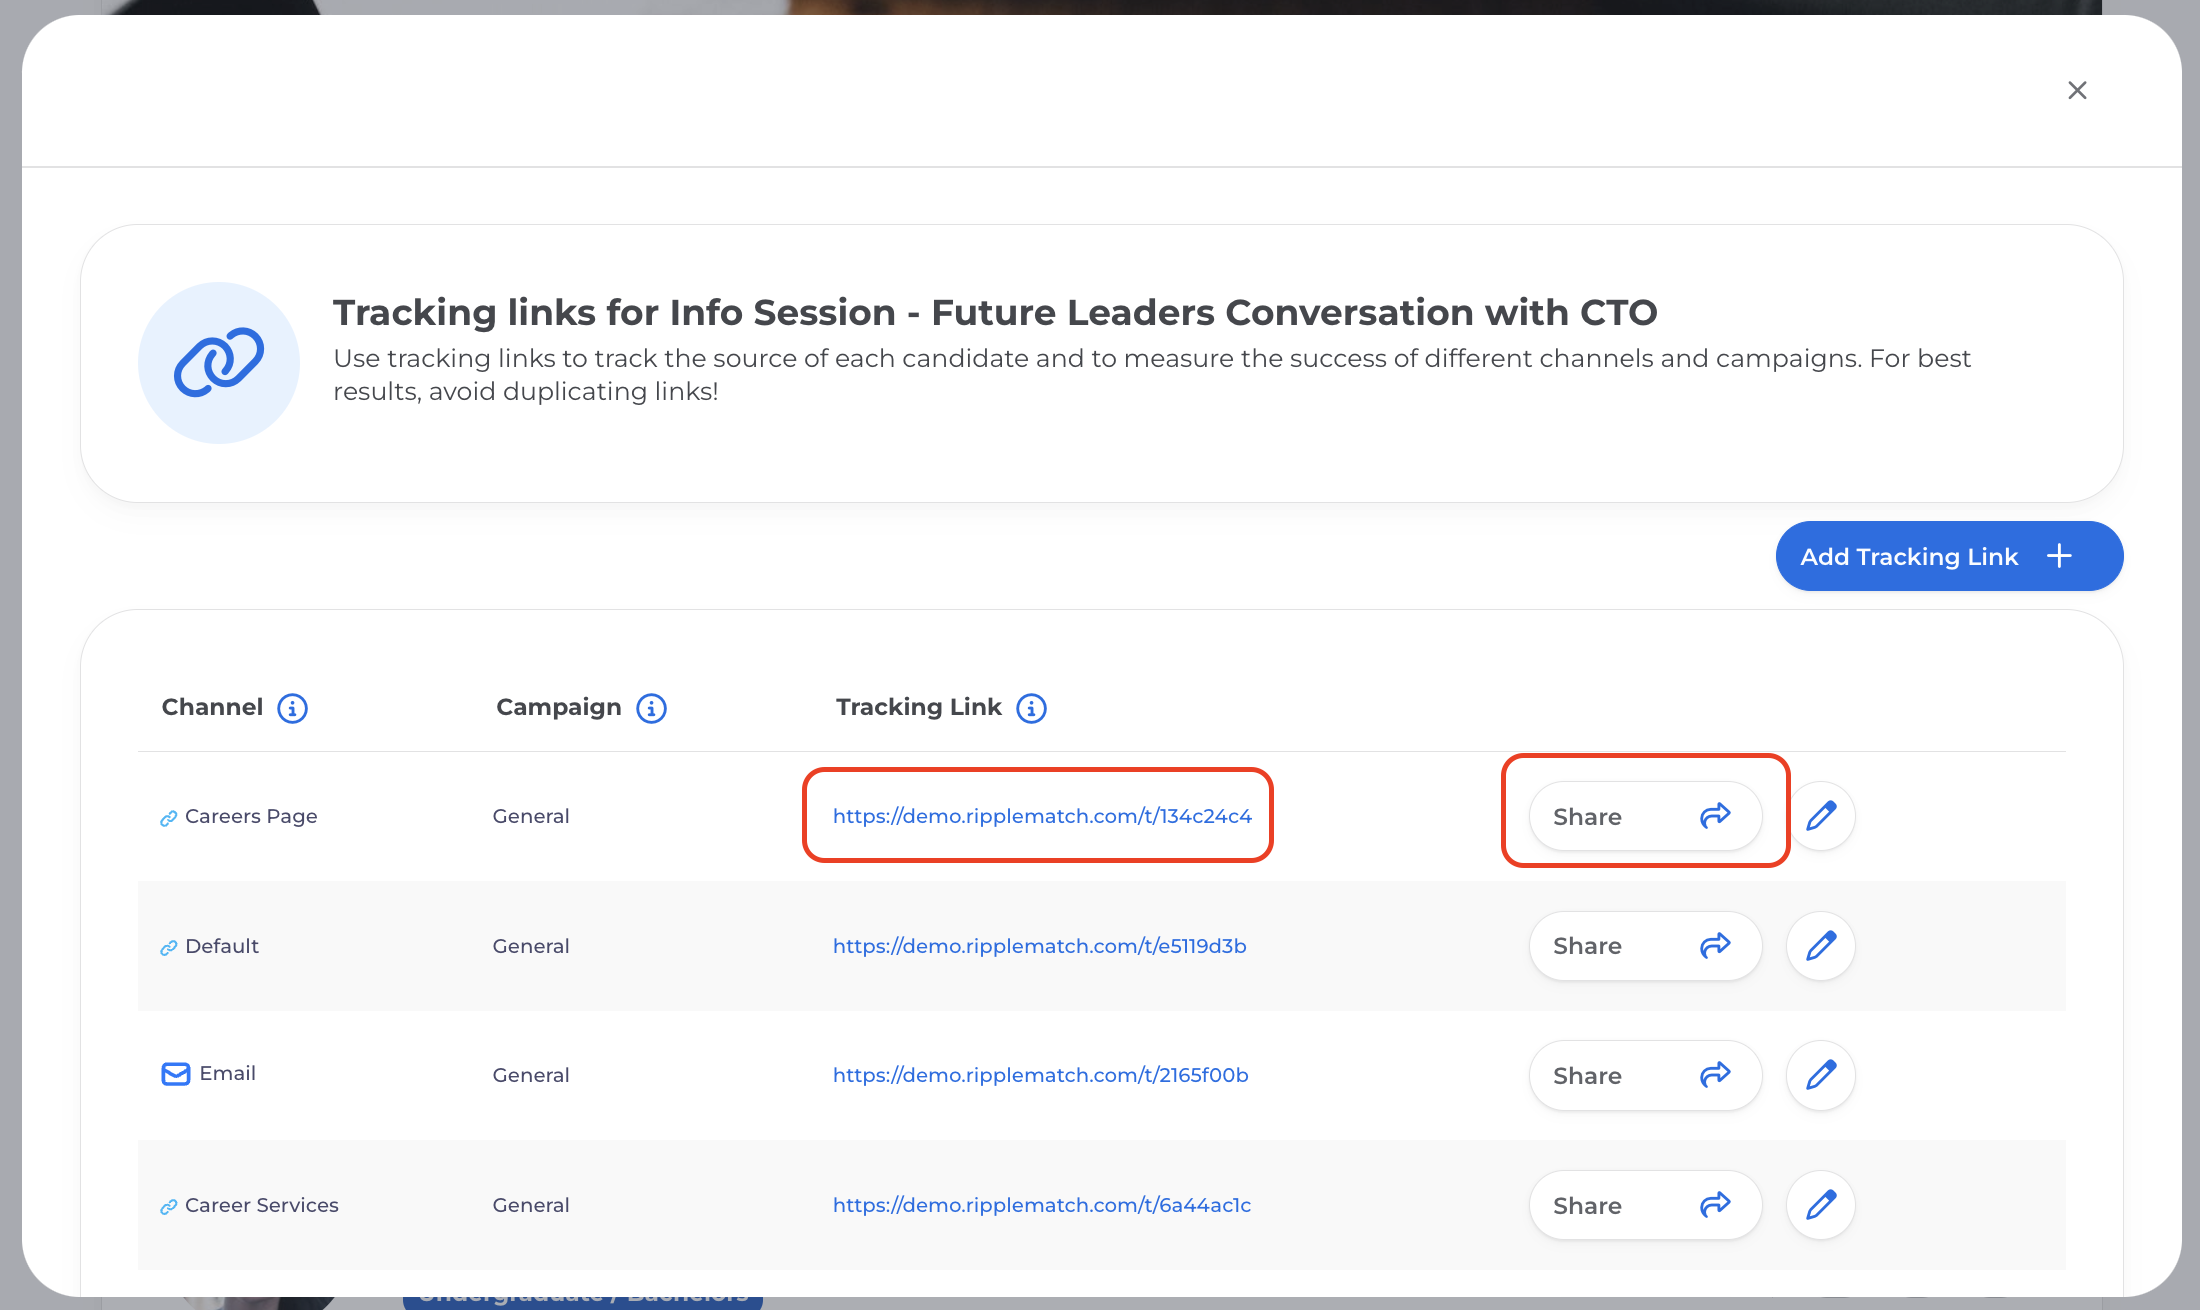
Then, you can either create a new tracking link using whatever naming convention you'd like or you can use a pre-made tracking link and share it with candidates across your network.
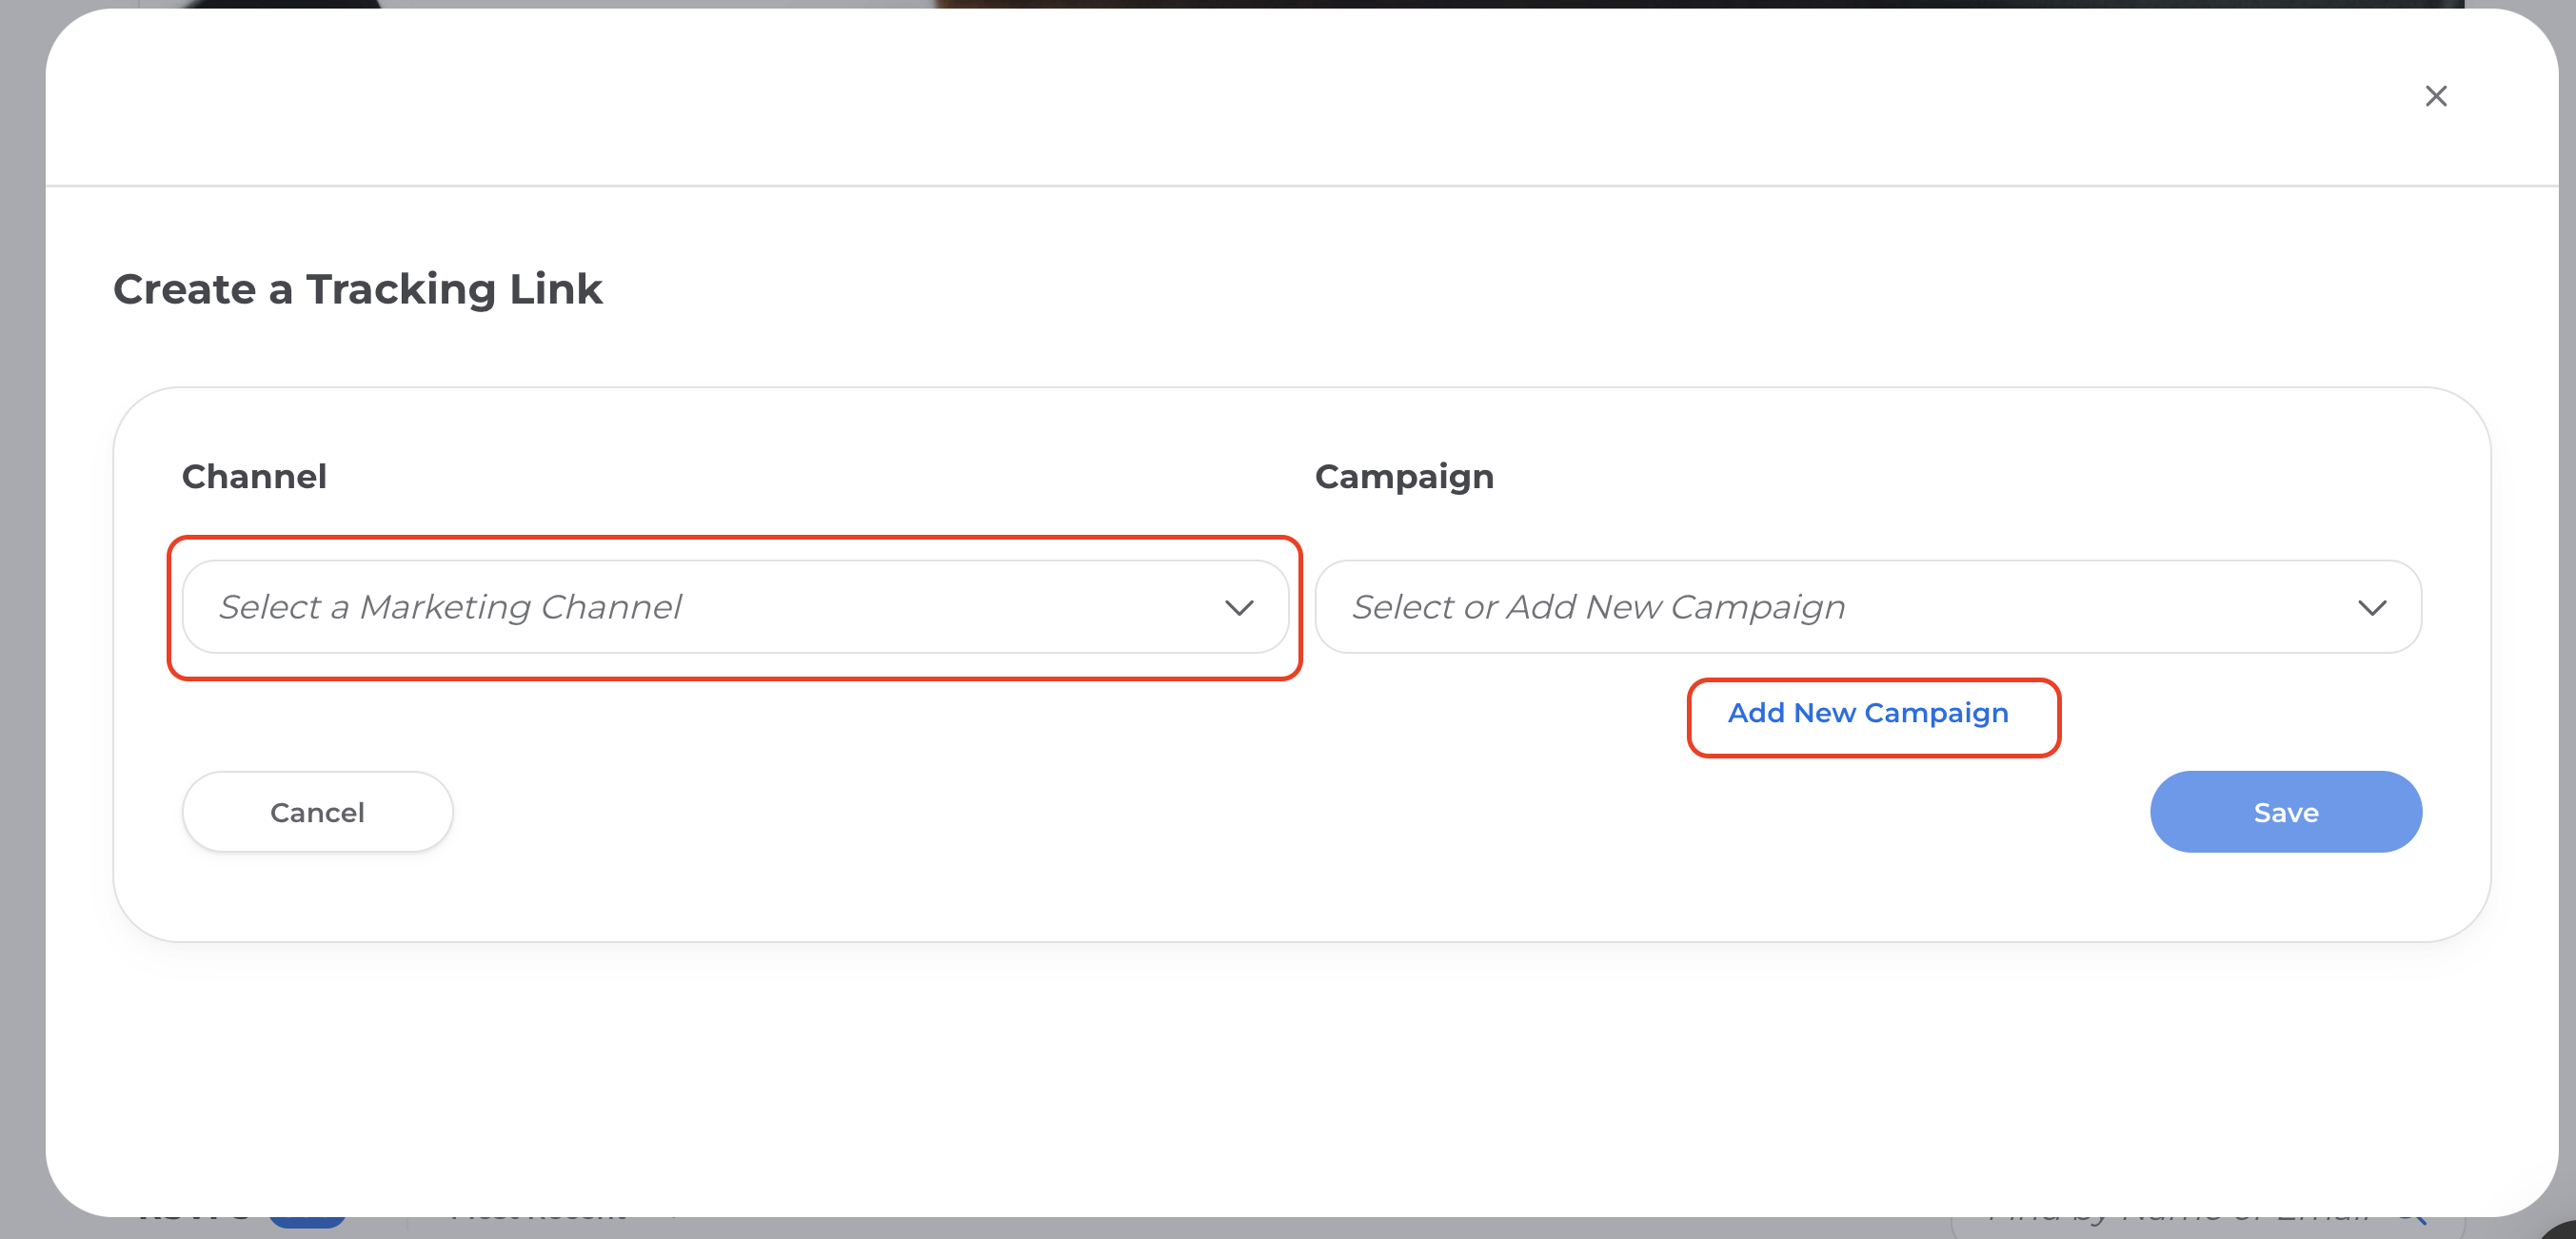
Each Tracking Link you create has two categories of information: a Channel and a Campaign. Use Channels to measure the relative impact of common candidate sources (e.g. LinkedIn, Email, Career Services) and use Campaigns to add specificity to your Channel or strategy (e.g. In-mail outreach, day of the week, subcategory of group that you sent a link to). This will allow you to better understand which of your Channels and messaging Campaigns are leading to event attendees in your analytics.
To create a new Tracking Link, click 'Add Tracking Link'. Then select the 'Channel' from the drop-down and click 'Add new Campaign' to be able to name the tracking link whatever you'd like.

Once a tracking link is created, you can copy the link via the 'Share' button. There you will find pre-written text that you can share with your network alongside the link to the event. Or you can copy the actual link itself and write up your own post/communications.

When candidates RSVP, you'll find them on your event management page with a tag correlating with which source they came from! So rest assured that any candidate who RSVPs to your event through your Tracking Link will be attributed to that candidate source.

![1-RM.png]](https://resources.ripplematch.com/hs-fs/hubfs/1-RM.png?height=50&name=1-RM.png)