Guide: Event Imports
It’s important to accurately track who you are meeting at events. This will allow you to centralize all students you are meeting across all events in one location and understand who needs to be followed up with in what way.
A key way to streamline your check-in process is by leveraging the ability to import candidates into your events. These imports can be done either before or after an event.
Here are some scenarios where you might benefit from imports:
-
You have a list of students pre-event who are already signed up for a time slot with you at a career fair you're attending.
-
Post-event (career fair or conference) the host gave you a spreadsheet of students' names and emails.
-
You kept a list of students who you met at an event on the side, and you didn’t check in every single person using the QR code or links during the event.
How to Import a CSV into your event:
-
Select the three dots icon within the event that you'd like to import students into.
-
Select 'Import CSV' from the drop-down.
-
Format the data in your CSV (Note: column headers must be the same as shown in the 'Sample Data' in the same order).
-
Save your CSV locally and then upload (Note: file must be saved as a CSV; no .XLS, .XLXS or PDF's will be accepted).
-
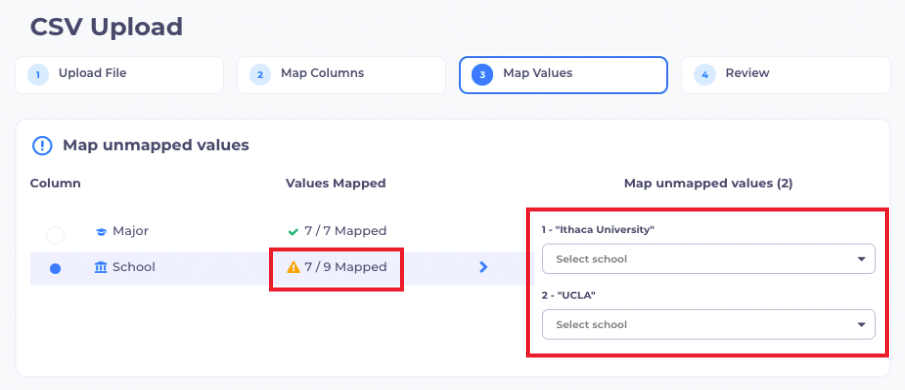
Once fully loaded, if you see any caution signs, map the majors and schools to accepted fields if any are missing. Find the closest major if the exact one is not on the list. If there are any other issues, school or major can be left blank.
-
Once finished mapping Majors and Schools, click 'Continue' on the bottom of the screen.
-
Confirm the details, and 'Submit'
-
Refresh your event, and you will see the students!


![1-RM.png]](https://resources.ripplematch.com/hs-fs/hubfs/1-RM.png?height=50&name=1-RM.png)